How to Fix Common Home Issues Without Hiring a Professional
Master Basic Home Repairs and Save Money
Introduction
Welcome to the world of do-it-yourself (DIY) home repairs! Whether you're a seasoned handyman or a beginner, there are plenty of common household issues that you can fix yourself. From leaky faucets to drywall cracks, many of these problems don't require professional intervention. By learning how to handle these issues yourself, you can save both money and time while gaining valuable skills.
In this article, we'll cover essential tools and materials, step-by-step guides for fixing common problems, and tips for maintaining your home. We'll also discuss the importance of DIY skills and the benefits of taking on these projects yourself.
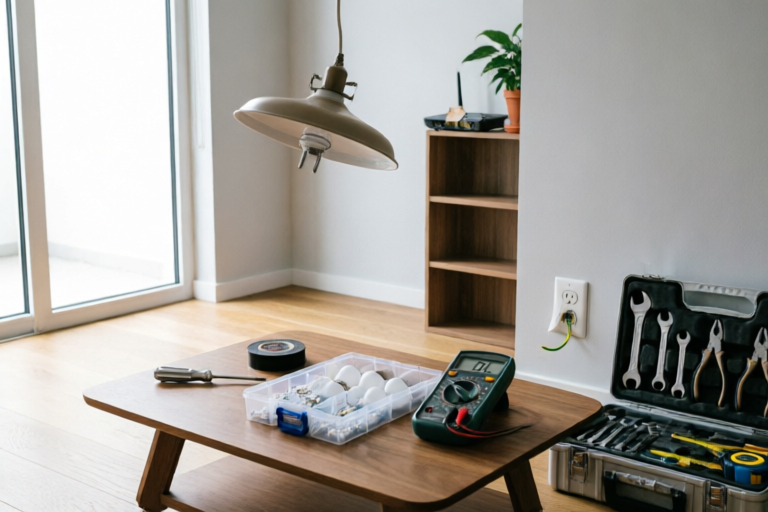
1. DIY Tools and Materials You Should Have
Essential Tools for Basic Home Repairs
To start, it's important to have a well-stocked toolkit. Some of the most commonly used tools include:
- Hammer: For driving nails or prying off stubborn pieces.
- Screwdrivers: Both flathead and Phillips for various screws.
- Pliers: For gripping and turning objects.
- Wrenches: To tighten or loosen nuts and bolts.
- Measuring tape: For accurate measurements.
Having these basic tools will allow you to handle a wide range of repairs. Additionally, it's helpful to invest in some recommended materials such as paint, sealant, and joint compound. Proper organization of your toolkit ensures easy access to the tools you need when you need them.
Recommended Materials for Common Fixes
When it comes to materials, having the right supplies is just as important as having the right tools. Here are some items you should consider:
- Paint: For touch-ups and minor renovations.
- Sealant: To prevent water leakage around windows and doors.
- Joint compound: For filling and smoothing out drywall cracks.
- Caulk: For sealing gaps between walls and floors.
- Plumbing supplies: Such as washers, O-rings, and replacement parts for plumbing fixtures.
Organizing your toolkit and keeping your materials accessible will make it easier to tackle any issue that arises.
2. Fixing Leaky Faucets
Identifying the Source of Leaks
Before you can fix a leaky faucet, you need to identify the source of the problem. Common causes include worn-out washers, damaged O-rings, or faulty valves. Once you've pinpointed the issue, you can proceed with the necessary repairs.
Step-by-Step Guide on Replacing Washers and O-Rings
- Turn off the water supply: Locate the shut-off valve under the sink and turn it clockwise to stop the flow of water.
- Remove the handle: Use an Allen wrench or screwdriver to remove the handle from the faucet.
- Disassemble the faucet: Unscrew the nut holding the stem in place and remove the stem.
- Replace the washer and O-ring: Inspect the old washer and O-ring for wear and tear. Replace them with new ones if necessary.
- Reassemble the faucet: Reverse the disassembly process to put everything back together.
- Test the repair: Turn on the water supply and check for leaks.
By following these steps, you can often fix a leaky faucet without needing to call a plumber.
Tips for Preventing Future Leaks
To prevent future leaks, ensure that all connections are tight and that the washers and O-rings are properly installed. Regular maintenance, such as checking for loose connections and replacing worn-out parts, can also help extend the life of your plumbing fixtures.
3. Repairing Drywall Cracks
Understanding Why Drywall Cracks Occur
Drywall cracks can occur due to several factors, including settling of the house, temperature changes, or structural movement. These cracks may appear on walls or ceilings and can vary in size. While they may not always be a sign of serious structural damage, addressing them promptly can prevent further deterioration.
Instructions for Patching Small Cracks with Joint Compound
- Prepare the area: Clean the crack and surrounding area with a damp cloth.
- Apply joint compound: Use a putty knife to apply joint compound over the crack. Make sure to feather the edges for a smooth finish.
- Let it dry: Allow the compound to dry completely before sanding.
- Sand the area: Gently sand the dried compound until it blends seamlessly with the wall.
- Repeat if necessary: Apply additional layers of joint compound if the crack is deep or wide.
- Paint the area: Once the final layer of compound is sanded, repaint the patched area to match the rest of the wall.
With these steps, you can effectively repair small drywall cracks and restore your walls to their original condition.
Finishing Techniques for a Seamless Repair
To achieve a seamless repair, focus on proper application and sanding techniques. Feathering the edges of the joint compound helps create a smooth transition between the patched area and the surrounding wall. Applying multiple thin layers instead of one thick layer also contributes to a smoother finish. Finally, use a high-quality primer and paint to ensure the repaired area matches the rest of the wall perfectly.
4. Replacing Light Switches and Outlets
Safety Precautions When Working with Electrical Components
Working with electricity can be dangerous, so it's crucial to follow safety precautions. Before beginning any electrical work, turn off the power at the circuit breaker. Use a voltage tester to confirm that the power is off. Wear rubber-soled shoes and avoid working in wet conditions. If you're unsure about any aspect of the job, consult a licensed electrician.
Detailed Steps for Removing and Installing New Switches/Outlets
- Turn off the power: Go to your home's circuit breaker panel and switch off the corresponding circuit.
- Test for electricity: Use a voltage tester to ensure the power is off.
- Remove the old switch/outlet: Unscrew the mounting screws and carefully pull the switch/outlet from the wall. Disconnect the wires.
- Install the new switch/outlet: Connect the wires according to the manufacturer's instructions. Typically, black wires go to brass terminals, white wires to silver terminals, and green or bare copper wires to ground terminals.
- Secure the new switch/outlet: Attach the mounting screws and gently push the device back into the wall box.
- Restore power: Turn the power back on at the circuit breaker and test the new switch/outlet.
Troubleshooting Common Issues After Installation
If the new switch/outlet doesn't work, double-check the wiring connections. Ensure that the wires are properly connected to the correct terminals. If the issue persists, consider consulting an electrician to diagnose the problem.
5. Unclogging Drains
Methods for Clearing Clogs Without Harsh Chemicals
There are several effective methods for clearing clogs without resorting to harsh chemicals:
- Plunger: A plunger is often the first tool to try. Place the plunger over the drain and vigorously pump up and down to dislodge the clog.
- Drain Snake: A drain snake, also known as a plumbing auger, can reach deeper clogs. Insert the snake into the drain and rotate it to break up the blockage.
- Baking Soda and Vinegar Mixture: Pour half a cup of baking soda followed by half a cup of vinegar into the drain. Let it sit for an hour before flushing with hot water.
Preventive Measures to Avoid Future Blockages
To prevent future clogs, avoid pouring grease or food waste down the drain. Use a strainer to catch hair and other debris. Regularly clean your drains with a mixture of baking soda and vinegar to keep them clear.
6. Sealing Windows and Doors
Importance of Proper Sealing for Energy Efficiency
Proper sealing of windows and doors is crucial for maintaining energy efficiency in your home. Air leaks can lead to higher heating and cooling costs. By sealing gaps and cracks, you can improve insulation and reduce drafts.
Techniques for Applying Weatherstripping and Caulking
- Inspect the areas: Look for gaps around windows and doors where air might be leaking.
- Choose the right material: For larger gaps, use weatherstripping. For smaller gaps, use caulk.
- Apply weatherstripping: Cut the weatherstripping to fit the gap and attach it using adhesive or staples.
- Apply caulk: Use a caulking gun to apply a bead of caulk along the gap. Smooth it out with a putty knife.
Seasonal Maintenance Tips to Keep Seals Intact
Regular maintenance is key to keeping your seals intact. Check weatherstripping and caulk annually and replace any damaged or worn-out materials. In colder months, consider adding extra insulation to windows and doors to enhance energy efficiency.
Conclusion
In this article, we've covered several common home issues and provided step-by-step guides for fixing them yourself. By mastering these DIY skills, you can save money and time while improving your home. As you gain confidence, consider taking on more complex projects. For further learning, explore online tutorials, watch instructional videos, or join local DIY groups. Happy repairing!
Comments

These tips are spot on! I've been doing DIY for years and still find useful advice here. Keep it up!

After fixing a few things myself, I feel much more confident. Next up, maybe some electrical work?

Great list of essential tools! I organized my kit better after reading this. Now everything is within reach.

I'm nervous about tackling drywall cracks. Is there an easier way to do it? Maybe something for beginners?

Sealed my windows with caulk this weekend. Noticed a big difference in drafts. Thanks for the seasonal maintenance tips!

Safety first! I followed the steps to replace a light switch but had trouble with wiring. Any tips for rookies?
I tried the unclogging method with baking soda and vinegar. Worked like a charm! Now my sink is flowing smoothly again.
Just fixed my leaky faucet using the washer replacement tip! Saved me a ton of cash. Anyone tried the drywall crack fix?